Tuesday 13 November 2018

Do more with PDFs with PDFcandy

The Tool


About the Tool
PDF Candy provides free online and offline tools for working with PDF files (converting, splitting, merging, rotating, etc.).

How to Use the Tool
Users simply need to visit pdfcandy.com and then click the icon corresponding to the tool they want to access.  PDF candy can perform such actions as convert PDF to word, rearrange pages in a PDF, extract images from a PDF, etc.  Files can be uploaded from Dropbox, Google Drive or simply by drag and dropping them.

Why I like it
After teaching for 18 years I have amassed A LOT of resources...and back in the day many of them are PDF.  While I may not want to use an entire resource, I often find I want to use parts of PDFs. PDFcandy allows me to have digital copies of these PDFs that I can manipulate for my own use (with credit given of course).

Two uses in education
  1. Extract information from PDFs that you can manipulate
  2. Create PDFs of your own work so that it can’t be manipulated


Augment Reality with HP Reveal

The Tool
HP Reveal (Formerly Aurasma)


About the Tool
HP Reveal makes it easy for anyone to create and use Augmented Reality without needing to code. Users can create content by using the HP Reveal Studio. All you need is a trigger image (the image that users will scan - which you can create) and the overlay (what will appear when scanned - can be a video or image).  People simply need to open the Reveal app to view content.


Jargon alert:  An aura is an experience you create within HP reveal.


How to Use the Tool
To Create Auras
  1. Create an HP Reveal account
  2. Log in to your account
  3. Start creating Auras in Reveal Studio 
  4. Deliver your Auras to users

To Access Auras
  1. Download the HP Reveal app in the App Store or Google Play
  2. Follow the creator of the Aura
  3. In the app, scan the image and watch it come to life.

Why I like it
Augmented Reality can engage the learner and allows learners to delve deeper into the material at hand.  And, let’s be honest, there is some novelty with it!


Three uses in education
  1. Create Auras for common instructions (i.e, how to use the photocopier).  Link a logo to an image that will play a how-to video.
  2. Have students create book talks/trailers that are accessed when the cover of a novel is scanned.
  3. Have students create Auras to talk about art they have created that is displayed around the school.


This post is part of my annual NaBloWriMo exercise wherein I  write a blog post every work day in November.

Monday 12 November 2018

Being mindful with the Calm App

The Tool


About the Tool
Calm is a mindfulness and meditation app.  It offers sleep stories, music for meditation, deep breathing exercises, etc.  This school year they began offering every teacher in the world free access to Calm.  Their aim is to empower teachers with mindfulness tools and resources they can use to help kids learn to be mindful.

How to Use the Tool
Fill in the form to receive your free access code
Download the app and enter your code
Open the app and begin feeling calm

Why I like it
The world is a busy place.  I think the pace at which we move it going to have long-term effects on us...and not necessarily in a good way.  There are so many children who feel overwhelmed and don’t have the tools to find peace and balance. Moreover, teachers don’t necessarily have the knowledge to help students find balance.  This tool can really help us all.

Three uses in education
Calm can be used to help students who are in an escalated state de-escalate.
Play the mindful music during high-stress times like tests or exams
Use the stretching feature in Phys Ed


This post is part of my annual NaBloWriMo exercise wherein I  write a blog post every work day in November.

Thursday 8 November 2018

Explore Indigenous Lands with Native-Land.ca

The Tool


About the Tool
Native land is a mostly crowd-sourced map tracking information about indigenous land across the Americas and Australia.  To use the tool, you simply type in an address and, powered by Google Maps, you are “taken” to that place in the world with all Colonial markings removed (no streets, landmarks, etc.). There are links on the left-hand side that guide you to information about Indigenous peoples, territories, and language of the land.


How to Use the Tool
  1. Go to Native-Land.ca
  2. Click the disclaimer
  3. Type in an address
  4. Explore the linked resources.


Why I like it
In this time of truth and reconciliation, I like how I can learn about land from a perspective that has otherwise been unknown to me - the kind of learning I don’t see in traditional textbooks or classrooms.


Three uses in education
  1. Support work around Truth and Reconciliation
  2. Personalize the land acknowledgment, especially in areas with which you might not be familiar.
  3. Learn about maps without “westernized” markings - great for learning and discussion.


This post is part of my annual NaBloWriMo exercise wherein I  write a blog post every work day in November.

Wednesday 7 November 2018

Make infographics with Zanifesto

The Tool


About the Tool
Zanifesto a fully free infographic maker (unlike other tools like picktochart or venngage).  Choose from seven different sizes and dozens of templates.  There is a library of graphics and the creator is adding to it constantly.

How to Use the Tool
  1. Go to Zanifesto.com
  2. Click “Create Something”
  3. Choose your size
  4. Choose to use a blank canvas, template or an infographic from your personal gallery.
  5. Name your Doc
  6. Start infographic-ing….is that a word?

Why I like it
Without a doubt, the best part is the price - FREE!  I also like the ease of the interface.

Three uses in education
  1. Vere away from the traditional essay and have students take a stance and support ideas through infographics.
  2. Use infographics to report data about your school or tell your school’s story.
  3. Infographics are great conversation starters for students and educators.


This post is part of my annual NaBloWriMo exercise wherein I  write a blog post every work day in November.

Tuesday 6 November 2018

Conference Virtually with UnHangout

The Tool


About the Tool
UnHangout “is an open source platform for running large-scale, participant-driven events online”.  It was created by the MIT media lab. Unhangouts allows you (the host) to create a landing page (called the lobby).  In the lobby, there is a chat box wherein participants can see who is in and begin chatting. The host can stream a video to the lobby to welcome guests/participants.  Hosts can create breakout rooms, small side chat rooms that allow participants (to a max of 10) to have more in-depth conversations via chat and video chat. Documents can also be collaborated upon in the chat rooms.


How to Use the Tool
  1. Go to https://unhangout.media.mit.edu/
  2. Click “Create an Unhangout
  3. Give the unHangout a name, designate hosts, indicate start times, customize the URL etc. 
  4. Save the settings and start your Unhangout (or go in during the scheduled time)
Why I like it
I think this tool really personalizes online chats and allows learners and educators to connect virtually with ease.


Three uses in education
  1. Host an unconference or EdCamp virtually.
  2. Facilitate online discussion for a course to make the connections more personal. (No more inauthentic responses to peers’ posts).
  3. Join their FREE online courses for some self-directed PD.


This post is part of my annual NaBloWriMo exercise wherein I  write a blog post every work day in November.

Monday 5 November 2018

Back channelling with YoTeach!

The Tool


About the Tool
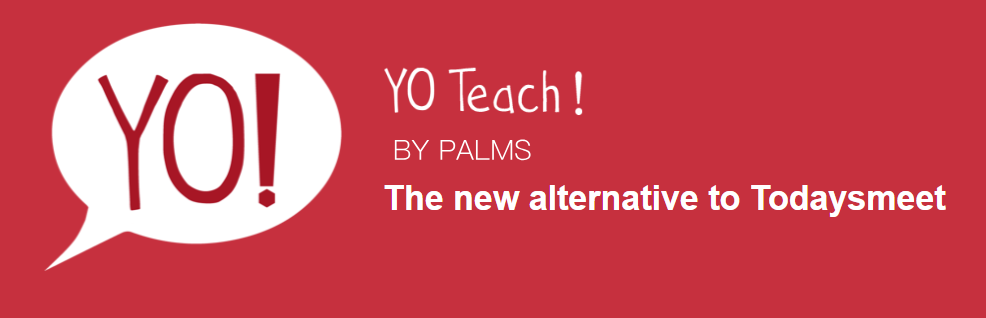
When Today’s Meet closed down last year, I was really upset. I had used it as my go-to backchanneling tool for a number of years. and, given the outcry on Twitter, I was not the only one who was heartbroken and in need of a new tool. Lo and behold, the fine folks at the Hong Kong Polytechnic University came up with a tool to mimic Today's Meet, and it might even be better (more features and no 140 character limit!).  It is called Yo Teach!

For those who don't know, a back Channel is a digital conversation that can happen synchronously or asynchronously. You often see these when people tweet with a hashtag at a conference to have conversations digitally.

Yo Teach! allows users to enter their name and type comments that are displayed on the website. Rooms can be locked down by teachers or made public, a PDF transcription of the conversation can be generated, pictures even can be uploaded and annotated by the poster or others in the conversation.  The conversations can also be password protected. (See here for all features and how to videos)


How to Use the Tool
  1. Go to yoteach.hk
  2. Title your room and give it a description.
  3. Check the boxes if you want to hide the room, password protect it, and enable admin features (I highly suggest doing this as this is where you can erase comments, generate the PDF, and have much more control of the “room”.)
  4. Hit create room.
  5. Enter a nickname, agree to the terms, hit submit.
  6. Get “talking”

If you enable the admin tools, you will have a pre-generated QR code, as well as a link, that you can share with students so they can access the room.

Pro tip: Have a set of norms typed out before you open the room and paste these as the first post.  This way, everyone knows what is expected of them. My biggest norm is “if you would not showed it out in class, don't type it here”.
Why I like it
Tools like Yo Teach! give an opportunity for all students to have a voice.  Introverted learners, students with exceptionalities, English language learners (or English-speaking students in foreign language classes)  all have a safe space and time for thought before sharing.

I use them in my classroom to give voice to those who might not otherwise participate. One year, for example, 1/3 of my students in a grade 11U English class were English language learners. They had brilliant ideas but weren’t speaking class because they were not confident in their Mastery of the language. When I opened up the backchannel, it gave them time to think and in some cases even use tools like Google Translate, to develop their ideas before sharing. It most definitely made the conversations we had in that class far more rich than they would have been without a backchannel.  


Three uses in education
  1. Use a backchannel during presentations so the audience can ask questions and make comments (they can be moderated if you enable the admin tools). This works in classrooms, school assemblies and/or faculty meetings.  Backchannels in these events allows the audience to ask questions without interrupting the flow of the speaker. 
  2. It is also great during conferencing times when a student might have a question but the teacher is otherwise occupied with another student or group of students. Others in the class might be able to offer a solution before the teacher is free - like we always say - the smartest in the room is the room itself. 
  3. Use the picture upload or draw feature to capture ideas visually.  You could annotate text, draw complex molecular structures, the sky is the limit. 


This post is part of annual NaBloWriMo exercise wherein I  write a blog post every work day in November.

Friday 2 November 2018

Digital Visual Poetry Tool

The Tool

About the Tool
Earlier this week my friend Andrew Fenstermaker reached out to ask me about a tool for making shaped poetry - a.k.a. concrete poetry.  I shared Visual Poetry - an online tool that allows you to paste in lines of text and then, using your mouse or track pad, have that text lay out on the page in any shape you desire.  This is an example of Robbert Burns’ poem “Red, Red Rose”.

How to Use the Tool (from the site)
1. Enter your text in the "Text" field.
2. Optional: Choose minimum size, maximum size, random angle, text color, and/or background color.
3. Click anywhere on the page, hold down the mouse and draw a picture.
4. Click "Clear" to start over or "Save" to save your drawing as an image.


Why I like it
I love the creativity aspects of this tool.  Students can make meaning not only with their words but also their art.

Three uses in education
1. The obvious - it allows students to create concrete poetry
2. Allow students to write, in any genre and attach images to the words to make more meaning.  I can see this working in procedural writing tasks.

This post is part of anual NaBloWriMo exercise wherein I  write a blog post every work day in November.

Thursday 1 November 2018

Web QR (NaBloWriMo 2018 is here!)

It is that time again! NaBloWriMo! November means a blog a day for me!  Some of you may have heard of NaNoWriMo; it is a writing activity that challenges writers to write a 50,000 word novel in one month (NAtional NOvel WRiting Month). Authors commit to writing every day.

While I don't feel I have a novel in me, I often say I wish I blogged more. So, two years ago, when I started in my current district-level roll, I decided to challenge myself by writing a blog post on every work day in November (notice I replaced NO from Novel with BLO from blog).

Last year, I did an A-Z theme (thank you Eric Curts, for the idea). This year, I am again going to pick an EdTech tool to highlight each day explain why I like, and three ways I see it used in education. Note that I say education and not classroom, this is intentional. As a consultant, a lot of the work I do is around coaching teachers and presenting to adults, so sometimes this will be my focus. Without further ado, here we go...  

The Tool

About the Tool
QR codes are those pixelated squares you see in magazines, on signs, just about anywhere. When scanning these codes, a variety of things can happen including automatically adding information to someone's contacts, launching an app, but most popularly directing the scanner to a website.  

QR codes are easy and free to generate, and can be accessed simply on a mobile device with a QR reader or, if you have iOS 11 or above on your iPhone, you simply need to scan the QR code with your camera app and a pop down notification will appear that will take you to the linked website.   

Earlier this week I was helping a colleague create a hybrid analog/digital breakout EDU activity.   We realized that students would be working with Chromebook and not mobile devices. This posed a problem with one step where they had to access information using a QR code.  A quick Google search later and we found web QR. It is an online service that facilitates reading QR codes with computers that have webcams.  

How to Use the Tool
1. Go to WebQR.com
2. Give permissions for the site to access your webcam,
3. Hold the QR code in front of the camera, and a link will generate.
4. Click the link


Why I like it
Chromebooks are excellent, economically friendly tools for a classroom. QR codes are simple ways to direct students to resources or activities. Having a tool that can make these two things work together is amazing in my books.

Three uses in education
  1. Have QR codes printed and put in a small binder in your classroom. Each QR code can link to important documents students might need during the course (e.g., syllabus, code of conduct, etc.).  WebQR is especially useful in this situation for learners without mobile devices in class.
  2. Have stations at faculty meetings wherein you put QR codes in various locations. Instead of teachers sitting at the same table with the same people the entire time, they get a chance to stand up and walk around and can easily access information without facilitators having to print everything out.
  3. Leave teaser QR codes around school campus to promote events. QR codes with no writing peak curiosity and people can't resist scanning them to see what it is all about.  (I realized this idea is not for this tool exclusively, but I have done it and it is a really cool thing to see everyone talking about the mystery QR codes.)

This post is part of
annual NaBloWriMo exercise wherein I  write a blog post every work day in November.